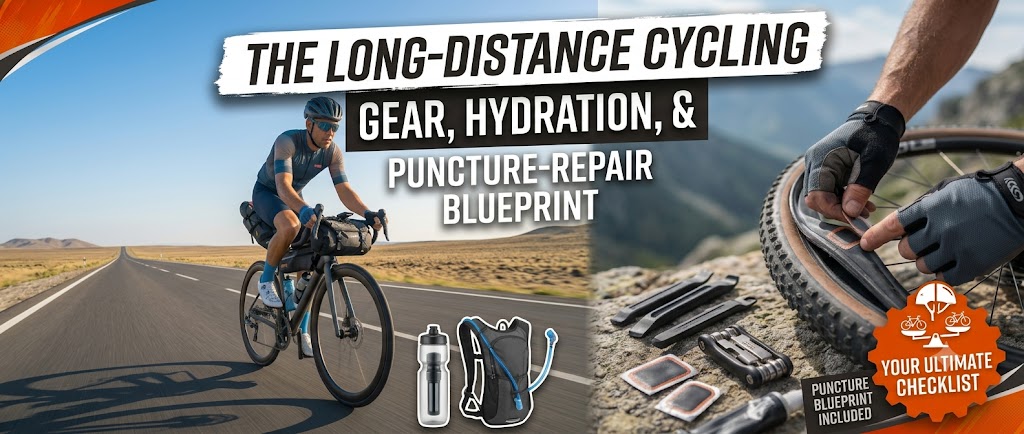
When a cyclist decides to graduate from short city loops and tackle long endurance rides—covering anywhere from 50 to 100 kilometers in a single day—proper preparation is non-negotiable. Cycling for multiple consecutive hours on the open highway transforms your ride into a serious endurance sport. If you head out the door without the right technical clothing, hydration plan, and emergency repair gear, a minor issue can quickly leave you stranded miles from home.
To perform at your absolute peak, minimize saddle discomfort, and manage roadside mechanical issues confidently, you must build an elite self-sufficiency framework. This means investing in targeted cycling apparel, mastering the physics of electrolyte hydration balance, and knowing exactly how to fix a flat tire on the go. This comprehensive blueprint breaks down the essential gear and preparation protocols needed to conquer long-distance cycling safely.
1. Saddle Comfort Engineering: The True Purpose of Padded Bib Shorts
The primary complaint among long-distance cyclists is intense friction and saddle soreness across their pelvic bones after two hours of riding. Many beginners try to fix this by purchasing thick, soft gel seat covers, which actually shifts pressure onto soft tissues and worsens the pain.
The scientific solution to saddle comfort is wearing professional Padded Cycling Bib Shorts. These shorts feature a built-in, highly engineered foam pad called a Chamois. The chamois absorbs micro-vibrations from the road, moves friction away from your skin, and cushions your sit bones. Crucially, cycling shorts must be worn completely without underwear. Wearing underwear traps sweat moisture, creates high-friction seams, and guarantees painful saddle sores. Apply a layer of anti-chafing cream directly to the pad before your ride to ensure smooth comfort for hours.
2. Roadside Self-Sufficiency: The Ultimate Flat Tire Toolkit
Out on the open road, stepping on a sharp thorn, a small piece of glass, or hitting a hard pothole can cause an immediate flat tire (puncture). You must carry an emergency saddle bag containing a full repair kit to avoid being stranded.
Your Essential Roadside Saddle Bag Checklist
- Tire Levers: Highly durable nylon tools needed to safely pop the tight edge of your tire off the wheel rim without damaging the inner tube.
- Spare Inner Tubes: Always carry two fresh inner tubes that exactly match your wheel size and valve type (Presta or Schrader). Replacing a damaged tube on the road is much faster than attempting to apply glue patches.
- Mini Hand Pump or CO2 Inflator: A lightweight pump mounted to your frame to re-inflate your tire to riding pressure, or a CO2 cartridge system that fills your tire instantly.
- Multi-Tool with Chain Breaker: A compact folding tool containing Hex keys to tighten loose handlebars, adjust saddle heights, or fix a broken chain link on the fly.
3. The Science of In-Ride Hydration and Electrolyte Delivery
When you pedal for hours, your body constantly expends fluids and vital minerals through sweat. Dehydration quickly lowers your total blood volume, making your blood thicker and forcing your heart to beat much faster to maintain your target speed, leading to early leg muscle failure.
To stay safe and perform your best, you must balance your fluid intake using proper minerals. Drinking plain water while sweating heavily dilutes the remaining sodium in your blood, a dangerous condition known as Hyponatremia. Always carry two large bottles on your frame: one filled with plain water and the second mixed with an electrolyte powder containing sodium, potassium, and magnesium. Take two large swallows of fluid every 15 minutes, drinking continuously before you feel thirsty to maintain a steady balance.
4. Intra-Race Fueling Metrics: Managing Carbs on the Bike
Cycling burns a tremendous volume of energy, expending roughly 600 to 700 calories per hour depending on your speed and the terrain. To keep your muscles firing perfectly, you must fuel your body while moving.
Aim to consume between 60 and 90 grams of fast-acting carbohydrates for every hour you spend out on the road. This target can be reached by eating clean energy bars, ripe bananas, or specialized carbohydrate energy gels every 45 minutes. Look for energy products that utilize a specific blend of maltodextrin and fructose to ensure fast absorption without upsetting your stomach. Always wash down an energy gel with plain water to keep your digestion smooth and your energy levels steady throughout your ride.
5. Post-Ride Cellular Recovery and Lower Body Stretches
Your endurance training session does not truly end when your bike rolls back into the garage; it ends when your body is fully recovered and repaired. Within 45 minutes of finishing your ride, consume a recovery shake or a solid meal containing a 3:1 ratio of carbohydrates to clean proteins to halt muscle fiber breakdown and kickstart tissue repair.
Conclude your long training day by spending 10 minutes performing deep static stretches for your lower body chassis. Focus heavily on stretching out tight quadriceps, hamstrings, calves, and hip flexors. Hold each stretch position for 30 seconds while breathing deeply to release deep muscle tension. By prioritizing your post-ride recovery nutrition and flexibility, you eliminate muscle soreness and ensure your legs bounce back strong for your next cycling path.
 Back to Blog